
;) My first car back in 1977 was a blue '68 Mustang.
It was very important to me.
My first car back in 1977 was a blue '68 Mustang.
It was very important to me.
Dad bought the car from a lady at work about the time I started driving. The loan interest was 14.6%! I made the payments of $75/mo working at a computer company in Irving while going to Richland High.
It was a lot of work to keep it running. It left me inconveniently stranded more than a few times so I had to carry tools. Once I had to pull off a busy highway and replace the ignition points just to make it home.
I didn't change much on the car but it did get a fancy pop-open gas cap from the Pate swap meet, headers, big tires, a decent stereo, and chrome traction bars. Other than that, it was stock.
In 1981, my new job in Garland demanded a more reliable car. I was very sad to have to sell it and always wondered where it was. Even though I continued to go to Mustang car shows, I never owned another one.
My Father was a very good record keeper and when he passed in 1999 I found the old loan paperwork in his files. It showed the car's VIN number which I thought was lost. Thanks Dad, you're the best!
In 2010 I decided to go to the effort to find out what happened to it. Since it was not a convertible or fastback, the chances were good it got crushed or left in a field to rust.
So, I went down to the DMV and had them look up the VIN. The lady said "Nope, no record found". I told her my story and she said it's possible the record would be in the old archives. She gave me a phone number to call for a special request form.
About 2 weeks after sending in the request form I got a letter back. It showed a man named Paul in Hurst as the owner, but the car hadn't been registered since 1988. I did some more digging and found a phone number for him. It sat on my desk for a while and one Saturday I got enough courage to call. What's the worst that could happen right?
;) I got right through to Paul. He said he bought the car in the mid-80s to restore.
He did some work on it but got distracted by another project and moved the car into storage.
Storage? What do you mean, it's still there?
He said yes, it's in a shipping container at a farm in southern Oklahoma where
it has sat for almost 20 years.
I just couldn't believe it.
I got right through to Paul. He said he bought the car in the mid-80s to restore.
He did some work on it but got distracted by another project and moved the car into storage.
Storage? What do you mean, it's still there?
He said yes, it's in a shipping container at a farm in southern Oklahoma where
it has sat for almost 20 years.
I just couldn't believe it.
Over the next couple of weeks we worked out a deal. He was very excited for me and thought the story was great. On April 13th, he and his wife brought it to my house on a trailer.
The car had most of the parts but everything needed rebuilding. It even had the chrome traction bars and the pop-open gas cap I added when I was 18. Most 40-year old Mustangs are rusted pretty bad but this one had mostly mild surface rust.
;)
;)
This blog documents the rebuild back to its original factory condition, right down to the AM radio and single exhaust. It's a fair-weather driver, not a trailered show car. Total time to restore was 22 months, 1100 hours.
| At Richland High School 1979 | Before restoration 2010 |
;)
;)
;)
| Front | Interior | Steering | Engine | Rear | Trunk |
;)
;)
;)
;)
;)
;)
;)
|
|
|
Finished! *
* These cars are never really finished :) 9/9/12 I drove the car to Fort Worth where my childhood home is to take the exact same picture as 33 years earlier. My brother Randy was there to help. Here is the picture in 1979 and 2012. 3/1/12 First time to drive my Mustang to work in 31 years. 2/17/12 The annual East Texas Auto and Cycle Show is my finish line for this project. As with many things about this car, it's my first show to ever display in. I made a sign that told the story. Paul, the previous owner, and his wife came to see the car. I was very excited to receive 2nd place in the Hardtop-A category.
1/7/2012
Maiden voyage!!
It was only about 30 feet of movement but a lot has to be working to make that happen.
Door glass, and wheel covers and several other things still need to be done.
12/28/11
Trunk finished out nicely
and lots of other things such as doors, seats, dash pad, bla bla bla.
The front grill, headlight buckets, stone deflector, valance, etc took about a week of piddling.
Picture 1
Picture 2
11/25/11
Things are coming together.
Rear qtr windows installed.
Carpet installed.
Door interiors painted.
10/30/11
Starting up the engine was another milestone.
Lots of things have to be working to make this happen - electrical, radiator, exhaust, fuel.
Thanks to Eddy for all his help.
It took a long time to get fuel pumped from the tank into the carb.
A funny thing happened - no oil pressure. Come to find out, a dirt-dobber plugged up the sending unit pipe.
Took a while to figure that out.
10/17/11
Headliner installation is tricky because of the sail panels.
I used about 50 giant paper clamps from the office supply store.
I learned several tricks. Thanks Craig for all his help.
It took 2 tries to get it right and about 2 weeks of random work. Luckily headliners are fairly cheap.
After that the front and back glass was installed, thanks again to Craig for helping me.
10/10/11
Fuel line
and gas tank installed.
Brand new single-exhaust system just like factory installed. I was able to save my original Y-pipe.
The AC box and vent hoses also installed. It's really packed up under the dash on an AC car.
The AC controls restored nicely.
9/4/11
The waterpump bolt setup is complicated on this car because of all the accessories.
Here's a drawing
I made (Full size) to show each bolt and bracket.
The belt system is complicated on this car
because it has AC with 2 idlers and power steering.
8/23/11
Installing the motor was a family event.
Remember what it looked like before?
Now it's like new.
Big milestone.
8/20/11
Assembly is going pretty fast.
I sprayed 3M BodyShutz in the rear wheel wells.
The brake pedal bracket is restored and ready to install.
The rear end housing is painted semi-flat black, and the 3rd member is epoxy red.
I had ChockoStang do the steering system, money well spent and saved me a lot of time.
Brakes are on - 4-wheel drum just like original.
Had to take them on and off several times to fix problems. First time took 2 hrs, last time took 15 min.
Suspension is in. Installing the coil springs was hard.
7/8/11
Painting done. Curtis and Craig helped me get it home and up my 300ft driveway.
Next step was to paint the dash in the driveway.
I had some custom light-blue rattle-cans mixed up at English.
Now the assembly begins.
1/30/11
Sanded the doors down. They have many more dents
than I could see so both got removed for new skins.
Here's what a DA sander can do to a misplaced finger.
I attempted to fill the qtr panel but Mike said I'd never be happy with it.
So he came over and tore it off.
Now off to the paint shop she goes.
11/14/10
I've been working like crazy to get the roof and quarter panels sanded and filled before the weather gets too bad.
40hrs so far.
There is quite a bit of sheetmetal damage to fill -
Pic 1,
Pic 2,
Pic 3.
I think a tree must have fallen on the roof.
This giant Frankenstein seam was from a rear-end collision that happened in the 70s according to the first owner.
Now it is smoothed out, ready for primer.
Even with a tarp, a layer of plastic and rust preventer, rust is still occurring on my newly-sanded chassis.
Jerry came over and welded in the battery pan.
The dogs are not interested.
11/4/10
Engine is starting to look good.
I made a vacuum attachment from parts from HomeDepot
to suck sand out of the body cavities - NO JOKES PLEASE!
Got the diff painted.
My unflat driveway makes her hard to move, so she's left outside.
Started sanding the qtrs by hand.
Me.
The left qtr has a lot of filler.
Started doing my first filler to the trunk lid.
I found a welding rod on the frame rail left by a factory worker, just left it.
10/20/10
Several of the mustang club guys came over and got the car
onto the rotisserie.
Then I rented a 185cfm air compressor and a 300# sandblasting pot,
and began blasting.
pic 1,
pic 2,
pic 3,
pic 4.
Four hours of compressor time but took more than 8hrs of work. Didn't do the qtrs or roof because of warping.
Also blasted leaf springs and rear.
Five hours of getting and returning blasting equipment.
Craig came over and we got epoxy red primer painted, just like the factory used.
Primed.
I mixed Eastwood Underhood black per the can and it sprayed way too thin,
so resorted to Krylon 1613 Semi-Flat
for engine compartment.
Garage is packed.
9/25/10
Eddy helped me check out the engine,
set the valves and install the intake.
Got the engine all masked off,
then painted it blue that matched the old color.
Also stripped the fender apron.
Found another marking "2B" under the grime.
9/12/10 On Sept 23rd 1968, my Mustang was built at the Ford factory in San Jose, one of several they built Mustangs at. The factory was built in 1955 on land once owned by the Wrigley chewing gum family. While in San Jose I went to find out where it was. It's now the Great Mall. I parked right next to a Mustang. There is a plaque outside. Right behind the plaque is a restored 66 coupe. When driving away, there was a 65 convertible at the gas station.
9/6/10
Valve covers painted (see before) with Plastikote 224 (Ford Blue) which was a match to paint fragments I found on the engine.
Bolts painted for engine.
Got the under-dash AC system removed - it was completely full of sand and leaves.
The fan and pulleys blasted and painted.
I blasted, painted, then hand lettered the balancer - came out great.
Old waterpump now rebuilt by Mike at WaterPumpMan.com, then I painted it - looks awesome.
Pan and timing cover on engine with help from Eddy. The gasket set had 2 right-side pan gaskets.
The car's VIN was stamped on the engine at the factory - every number matches on this car now.
Finally found a batch of AC parts correct for a pre-March 68 coupe.
My garage is packed to the max.
8/8/10
Engine is back from the rebuilder - Picture 1, Picture 2.
I had them save all of the old engine parts.
Still working on removing the stuck leaf springs
(using a sawsall now).
Coil bracket was badly pitted but now restored
along with the coil.
The steering is out now.
The steering bracket wouldn't budge, then I remembered that I had it welded to the frame
back when I was 18 to get headers to fit.
Left and Right fender VIN numbers are now exposed and they match the car - All numbers match!.
Got FR380 tires mounted to the wheels.
7/29/10 Painted the exhaust manifolds then baked them on the grill - yum. The water pump housing is a C8 (a true 1968) model. That's good but it will get rebuilt with the correct impeller. Got the rest of the grill off and the fenders, and most of the suspension. She looks kinda naked. 7/22/10 Removed differential. Got wheels back from blaster powdercoated - they look good. Removed parking brake cable/lines. Removed front brakes. Ordered a set of Firestone FR380 205/70R14 tires From Bill Day Tire Center. Got a nice gash on my forehead when a breaker bar came off a 42 year-old rusted bolt. Without scars, There Is No Victory! :) 7/18/10 Couldn't find a gasket for the starter cover so made one from scratch . Starter is finished, see Before/After. Dissassembled Rear brakes. Built a soda blaster and started cleanup on the carburetor. My Workbench is a mess. 7/15/10 Starter repainted and ready for rebuilding. Coil was super yuky, now painted original colors - black base with tractor yellow top just like in 1968. Landed 5 steel 14x5 original wheels with 8MK codes! Transmission back from rebuilder. Also got the backlite molding removed thanks to Craig. The backlite is original CarLite. Interior qtr panels and one rear window/regulator removed. 7/7/10 The rebuilder already has the engine bored 30-over. Picked up the re-core'd radiator. Got the windshield molding off - took about an hour. The windsheild has a crack. It's not the original glass anyway, so not too terrible. 7/6/10 Lots of work going on. Got the Valve covers and oil pan stripped. Began rebuilding the starter - it's a 1972 model. Got the engine all loaded to go to the rebuilder. 6/23/10 Spent 2 hours cleaning 40 years of concrete-like crud from the bell housing and transmission case with paint thinner and Q-tips. Allen says "Why Dad, the first time you drive it it will get all dirty again" :) Well son, I'm gonna teach you how to keep it clean! Another 2 hrs on the 24th cleaning the transmission case. 4 hrs. 6/22/10 Took radiator to rebuilder, he's going to save the tanks and put in a new core so the parts that are seen will be original. It's a little more expensive than buying a complete new one, but I'd rather keep parts of the old one. Soaking and power washing the transmission housings some more - stuff is crusted on there really good. Scraped the trunk some more - about 50% done. Super hot and humid. 2 hrs. 6/21/10 Scraped on the trunk more. picked up transmission housings to clean them before Jimmy puts it all back together. 2 hrs today. 6/20/10 FINALLY got the battery tray removed. It was rusted really good as most Mustang trays are. Had to drill out the bolt heads and grind them down. Tried scraping the trunk paint where I put oven cleaner last week and it just came right up. Much better than aircraft stripper. Both heads removed now and hanging on the hoist as the block is mounted to the stand. Block is 302, heads are 289. 2 hrs today. 6/16/10 Got the trany removed from the engine and taken to Jimmy at Hayes Automotive here in Tyler. I backed up the trailer to the garage and slide the trany off onto a spare tire. Jimmy's gonna rebuild the innards. Should be about 2 weeks. I'll pick up some of the components to clean up after he tears it down. Removed Dampener with a puller borrowed from Eddy. Timing cover off - chain looks pretty loose. Engine moved to stand. Intake manifold off. Left head removed! I see pistons!! Woops - 3 bolts, where did those come from? 4 hrs today.
6/15/10
Pulled the engine/trany today with help from Allen and Eddy. 6/14/10 Got in 2 more hubcabs from Ebay purchase, now have 5. They are gonna need polishing and the centers repainted. Removed the transmission linkage, shifter, kickdown linkage and cooler lines. Found a 1979 penny in the shifter - haha! The new line wrenches didn't prevent me from ruining both trany cooler lines. Removed oil pan and pickup tube. Engine hoist hooked up and the jack stands rearranged to pull the engine. The engine is lifted but can't pull it the rest of the way without another pair of hands. 2hrs. 6/13/10 Built paint booth - see the article below. Experimented with aircraft stripper in the trunk. It works but is a lot messier, and removes not only the sound deadener, but also the primer down to metal. It's difficult to scrape cleanly on uneven surfaces. I think I'll stick to the heat gun. 2hrs. 6/12/10 Removed starter. Removed oil pan (kinda). Removed rear light wiring harness. Scraped deadener from trunk, still a long way to go. Borrowed a coil spring compressor. Got the engine leveler installed, ready to pull engine, maybe Tuesday. 2hrs. 6/11/10 Guys from the Mustang club brought over the engine hoist. Transmission drained - what a giant mess! Exhaust manifolds removed. Still can't get the AC expansion valve off, but that won't stop me from pulling the engine. One more hour of work and the engine and trany can come out. 2hrs. 6/10/10 Drive shaft and U-joints removed. Front valance, front bumper guards, bumper removed. Bought 1" wrench at the new Northland tool store but still couldn't get the AC expansion valve to budge. Will try again tomorrow. Picture 2 hrs. 6/9/10 Exhaust removed! Tough little booger. Experimented with 2 different types of degreasers on undercarriage. Got in Air Cleaner and Heat Riser from Ebay purchase - looks real good and was a bargain. Did paint experiment with Krylon 1613 and the new "safer" 51613 which is the replacement. They look the same to me. This gets used on underhood components and is pretty critical if it is to look right. 2hrs.
6/8/10
Finally got the alternator bolt unstuck after soaking it for 4 days - geez!
Removed water pump, last heater hose, crank pulley.
Got all 4 bolts out of exhaust manifold-pipe fittings - they were really stuck good and access is bad.
Got a cool green bruise for my effort.
Found date code for intake manifold - it matches!
Got quote on rebuilding radiator - $350. A new one is $230 but it's not original with the FoMoCo stamp etc. Hmmm. I think I'll spend the extra $120 and cut back on Sonic or something.
2.5 hrs.
6/7/10 Received AM Radio from Ebay purchase. Gonna need a lot of clean up work. Has correct date code of 8TPZ. Even has knobs but one is broken. 6/6/10 Ordered 8 cans of Krylon 1613 semi-flat paint from Grainger. It's the correct color for underhood components and the new version sold in stores has been reformulated for environmental reasons and is way too glossy. Found 2 deluxe hubcaps on ebay for 42$ total. Got new keys duplicated at Home Depot. After telling the lady my story, she didn't even charge for it. I had to file all the keys to make them work correctly. 6/5/10 Removed PS pump, AC hoses, front turn signals, fuel pump, solenoid, oil sender, dist, hood lights, AC condenser. Won 68 Ford shop manual on ebay, woohoo! Alternator bolt still stuck, let it soak some more. Picture of Engine. 3 hrs. 6/4/10 Removed radiator, brackets, fan, hoses. 2hrs. Picked up parts from Paul in Hurst. He had the letters for the trunk lid, side emblems and some other stuff. 6/3/10 Removed carb, coil, hoses, regualtor, plug wires, thermostat, etc. 3 hrs. First order from Mustangs Unlimite - carb rebuild kit, keys, shirt, book. Won AM radio on ebay! Paint and body guy was suppose to meet up but never called - bla! 5/30/10 Removed hood with alex, headlights, grill, side lights - 2hrs 5/28/10 Removed qtr extensions, gastank, valance brackets, scraped trunk some - 1.5 hrs. Picture of rear torn down. 5/27/10 Removed seatbelts, backseat padding, trunk lid, painted jack handle - 2hrs. 5/26/10 Removed bumper, says 1979 on it! 5/25/10 Removed rear seats, rear side markers, tail lights, gas cap, filler tube - 1 hr 5/17/10 1st order to NPD for books. 5/16/10 Removed rear drums, rear shocks, traction bars - had to saw off the bolts they were rusted so solid - 2 hrs. 5/15/10 Ordered Report from MartiAutoWorks which tells details about the car's options and production date. 5/15/10 Started tear down, scraped floor pans looking for rust through but none found! - 2hrs. 4/29/10 Talked to Robert B., the first owner. He said it was his wife's car. Bought at Helm-Lary Ford in Hurst. It was rear-ended while parked in the street and the complete rear end had to be chopped off. That's NEWS to me! 4/28/10 Transfered title into my name. Also had the DMV look up the old lic plate - DBC205, and it's owned by a guy in El Paso. 4/13/10 Paul brought car to Tyler. 4/8/10 Agreed on price with Paul. 4/3/10 Called Paul and he told me that he bought the car in the mid 80's to restore. He got on to another project and didn't complete it. Put it in a storage container in OK where it has sat for almost 20yrs. 4/2/10 Got a letter from the DMV showing the current owner in Hurst, but it hasn't been registered since 1988. 2/5/88 Paul bought car from Angela. It was sitting in a field in Azle. It had been run through a fence and the windshield was broken. Spring 1981 Sold the car because I needed more reliable transportation. I have no documentation. 11/10/77 My Dad bought car from Robert B in Hurst.
|
;)
;)
;)
;)
;)
;)
;)
;)
;)
;)
;)
;)
;)
;)
;)
;)
;)
;)
;)
;)
;)
;)
;)
;)
;)
;)
;)
;)
;)
;)
;)
;)
;)
;)
;)
;)
;)
;)
;)
;)
;)
;)
;)
;)
;)
;)
;)
;)
;)
;)
;)
;)
;)
;)
;)
;)
;)
;)
;)
;)
;)
;)
;)
;)
;)
;)
;)
;)
;)
;)
;)
;)
;)
;)
;)
;)
;)
;)
;)
;)
;)
;)
;)
;)
;)
;)
;)
;)
;)
;)
;)
;)
;)
;)
;)
;)
;)
;)
;)
;)
;)
;)
;)
;)
;)
;)
;)
;)
;)
;)
;)
;)
;)
;)
;)
;)
;)
;)
;)
;)
;)
;)
;)
;)
;)
;)
;)
;)
;)
;)
;)
;)
;)
;)
;)
;)
;)
;)
;)
;)
;)
;)
;)
;)
;)
;)
;)
;)
;)
;)
;)
;)
;)
;)
;)
;)
;)
;)
;)
;)
;)
"Before" Pictures
Everything on this car needs to be rebuilt. The great part is the lack of rust - no sheetmetal will need replacing.
Hood Deck Engine Interior1 Interior2 Traction bars Trunk Suspension Brakes Exhaust Data Plate Engine Tag
;)
;)
;)
;)
;)
;)
;)
;)
;)
;)
;)
Eat Dessert First!
In a classic example of eating dessert first, I couldn't resist getting a fresh set of keys and a Mustang fob. I told the story to the lady who cut the key blanks for me and she didn't even charge me. I had to do some filing and sanding to get them to work correctly.
;)
Disassembly
Virtually everything will get taken apart and cleaned, rebuilt and/or fixed. Smaller parts and fasteners are going into ziplocks and labeled.
Disassembly pictures: Front Trunk Scraping Exhaust Drive Shaft Parts More Parts Garage
;)
;)
;)
;)
;)
;)
;)
Electrolysis Rust Removal
I can't help but play some. Here's an experiment I did using electrolysis to remove rust on the rear valance brackets. 1 teaspoon of baking soda in 1 gallon of water, a 12-volt charger for the power supply, and a bunch of steel plates as the sacrificial anode. It took about an hour to get good results.
Pictures: In action, Rust removed, Steel anodes, Results.
;)
;)
;)
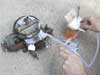
DIY Soda Blasting
Here's how I built a soda blaster to clean parts like carburetors. It is very gentle on soft metal like aluminum and won't pit the surface like harder media. Cheap and fun.
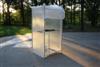
DIY Parts Paint Booth
I got tired of trying to find a decent place to paint parts so I built this paint booth using PVC and plastic sheeting. Check it out.
;)
Ford San Jose Assembly Plant
On Sept 23rd 1968, my Mustang was built at the Ford factory in San Jose, CA - one of several theu built Mustangs at. The factory was built in 1955 on land once owned by the Wrigley chewing gum family. The site is now the location of the Great Mall. This plaque is outside on a rock. When I visted, right behind the plaque was parked a fully-restored 66 coupe.
;)
;)
;)

Mustangs of East Texas
An unexpected benefit of this journey is meeting the great folks at the local Mustang club here in Tyler. I never knew it, but several of the buildings near my house are full of classic Mustangs and even some Shelbys. I'm also learning the fine art of accepting help :)

Comments
SC Wrote:
Go! Go! Go! Go Roger! This is such an awesome story. And I'm glad you're documenting so well...vicarious living happening right here!
RB Wrote:
Great story I hope to see you and your 68 at an MCA National Show in the future.
The guys at the East Texas Mustang club are great.
I to have a smilar story a 67 mustang that my mom purchased in 68 and it became my first car in 1976,
however I managed to hang on to it through the years.
Great story and good luck!
BF Wrote:
Roger....Great story! I had a '67 Mustang in High School and sold it around 1981. I wish you luck in restoring it!
JT Wrote:
WHAT AN INCREDIBLE STORY!!!!!
Because I "knew you when" I understand how important that car was to you.
I've got goose-bumps from reading your story!
That's like one of those miracle that you hear about but doubt in the back of your mind - like a Ripley's Believe it or not type of story.
I know that you've got a lot of work ahead of you but it sounds like a heart's desire and a work of love.
Thank you for sharing it with me!
SC Wrote:
OMG that Is so awesome Roger! Congrats!
KB Wrote:
WOW--it was meant to be!!
PB Wrote:
That is a great story Roger. I had a 68 as well. I tried putting big tires on it. Every time I went over a bump the fender-wells cut the outside of the tires. I installed my first cassette player in that car. Brings back some good memories. Thanx.
AV Wrote:
That's a really cool story! Thanks for sharing :)
TB Wrote:
Great story!!!
RA Wrote:
Now that's wild! You surprise the hell out of me sometimes. Congratulations Little Bro!
KK Wrote:
It couldn't have happened to a nicer guy!
PF Wrote:
Roger, great story and documentation, what a project this must be...
this hits real close to home as a friend of mine restored his mothers 68GT Mustang that had been
sitting for quite a while...we call it affectionatly the "trial and error Mustang" as some of the body work
is not quite perfect.
Thanks and Good Luck!